ment about 30 seconds after you pull a tray of stuffed cookies (lava style) from the oven when the kitchen smells like a high-end bakery collided with a chocolate factory. That warm, buttery, slightly caramelized aroma wraps around you, and you just know something special is about to happen.
I first stumbled into the world of lava-style stuffed cookies on a rainy Tuesday afternoon. My youngest daughter begged for those expensive molten chocolate cookies from the mall bakery, but I didn’t feel like driving 20 minutes each way. So I thought why not stuff the filling inside a classic cookie dough instead of just topping it?
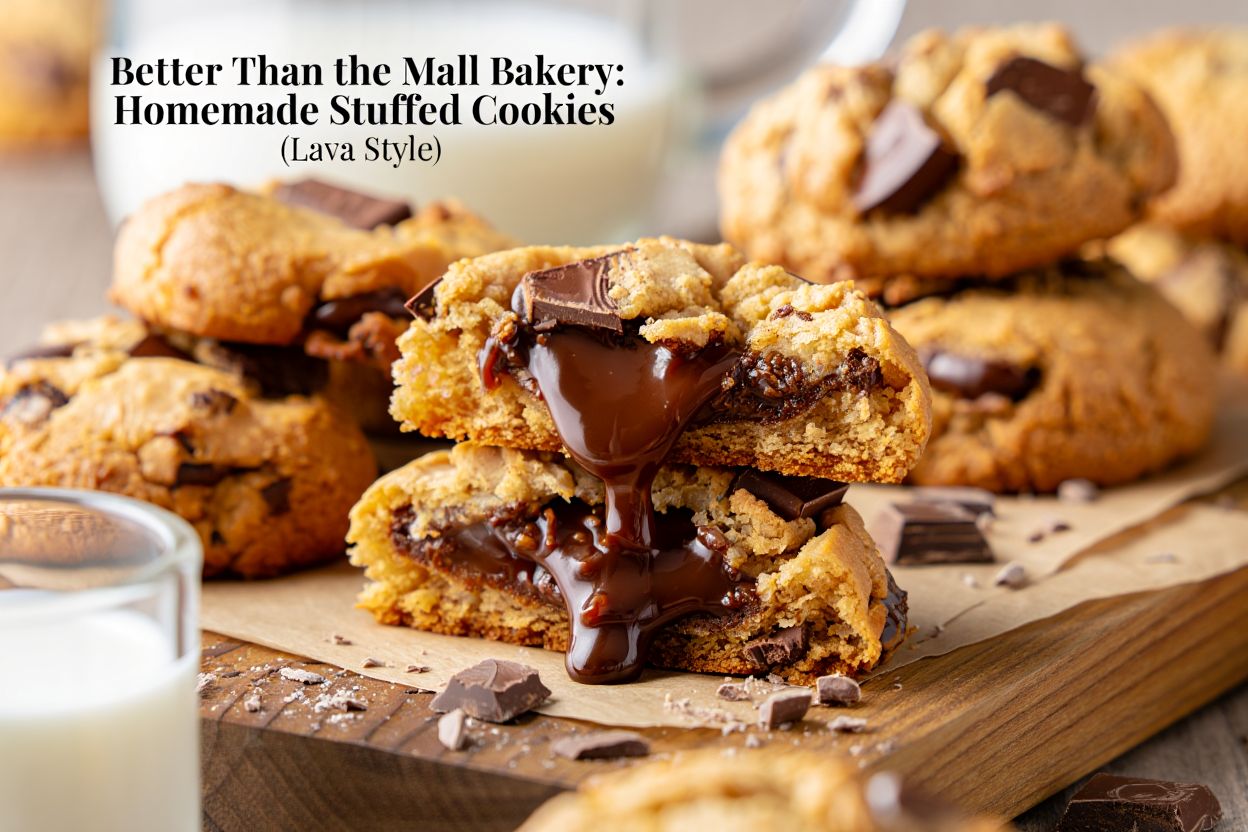
After twelve messy attempts (and one minor kitchen fire I won’t detail here), I finally cracked the code. These stuffed cookies (lava style) deliver that dramatic, Instagram-worthy chocolate spill the second you break them open. The best part? They stay soft and gooey for days not just straight from the oven.
Whether you’re a beginner baker or a seasoned pro looking for your next crowd-pleaser, this recipe is going to change your cookie game forever. Let me show you exactly how I make them.
Why You’ll Love This Recipe
- That dramatic lava effect is real – When my husband bit into his first test cookie, warm chocolate actually dripped down his chin. He didn’t even care. He just grinned and asked for three more.
- No specialty equipment required – You don’t need a stand mixer or fancy molds. I’ve made these with a wooden spoon and a mixing bowl more times than I can count.
- The dough is forgiving – I’ve accidentally over-chilled it, left it on the counter too long, and even doubled the butter once. Every batch still turned out delicious.
- Stays gooey for 3–4 days – Most stuffed cookies turn rock-hard by day two. Not these. The lava-style center keeps the whole cookie soft and almost fudgy.
- Endless filling options – Nutella, caramel, peanut butter, cookie butter, even jam. My teenage son insists on double-chocolate cores. My mom prefers salted caramel. Everyone wins.
- Freezer-friendly for spontaneous cravings – I keep a bag of pre-stuffed cookie dough balls in my freezer at all times. Fifteen minutes from frozen to molten heaven.
Recipe Overview
| Detail | Information |
|---|---|
| Prep Time | 20 minutes (plus 30 minutes chilling) |
| Cook Time | 12–14 minutes per batch |
| Total Time | 1 hour (mostly inactive chilling) |
| Servings | 18 large stuffed cookies |
| Calories per serving | ~310 calories |
| Cuisine Type | American (with European baking techniques) |
| Diet Type | Vegetarian (can be made dairy-free) |
I usually make these stuffed cookies (lava style) on Sunday afternoons when the whole family is home. That way, everyone gets to customize their own fillings, and we have dessert covered for the entire week.
Ingredients
the Cookie Dough Base
- 2 ¼ cups (280g) all-purpose flour
- 1 teaspoon baking soda
- ½ teaspoon sea salt (plus extra for sprinkling)
- 1 cup (226g) unsalted butter, softened to room temperature
- 1 cup (200g) brown sugar, packed
- ½ cup (100g) granulated sugar
- 2 large eggs, at room temperature
- 2 teaspoons vanilla extract
the Lava-Style Filling
- ½ cup high-quality chocolate chips, chopped chocolate bars, or Nutella
- ¼ cup creamy peanut butter, caramel sauce, or cookie butter (optional for variety)
Rolling & Topping
- ¼ cup additional chocolate chips for pressing into tops (optional but beautiful)
- Flaky sea salt for finishing
Substitutions I’ve Personally Tested
Gluten-free? Swap the all-purpose flour for Cup4Cup gluten-free blend. I’ve made this swap at least ten times for my gluten-sensitive sister-in-law. The texture is slightly more delicate, so chill the dough an extra 15 minutes.
Dairy-free? Use vegan butter sticks (I like Miyoko’s or Country Crock Plant Butter). The cookies spread a tiny bit more, so space them 3 inches apart.
Lower sugar? Reduce granulated sugar to ¼ cup and use stevia-based brown sugar substitute. The lava effect still works beautifully, though the cookies won’t caramelize as deeply.
No chocolate chips for filling? Chopped chocolate bars work even better because they melt into dramatic pools. I’ve used Ghirardelli, Lindt, and even Trader Joe’s pound-plus bars with great results.
Step-by-Step Instructions
1. Prepare the Lava Filling First
I learned this the hard way after scrambling to shape filling while dough sat out. Freeze your filling for at least 20 minutes before assembling.
Scoop tablespoon-sized portions of Nutella, peanut butter, or chopped chocolate onto a parchment-lined plate. You should have 18 equal portions. If using chopped chocolate, form rough discs about the size of a quarter. Pop the plate in the freezer while you make the dough.
Pro tip: For TRUE lava style, use a mix of chocolate chips AND a teaspoon of Nutella per filling. The Nutella stays liquid longer.
2. Mix the Dry Ingredients
In a medium bowl, whisk together the flour, baking soda, and sea salt. Set aside.
I used to skip sifting or whisking, and my first batch had pockets of baking soda that tasted metallic. Don’t be like me whisk thoroughly for 15 full seconds.
3. Cream the Butter and Sugars
In a large bowl, beat the softened butter, brown sugar, and granulated sugar together until light and fluffy. This takes about 2–3 minutes with a hand mixer or 4–5 minutes by hand.
You’re looking for a pale, almost whipped texture. When I first tested this recipe, I rushed this step, and the cookies came out flat as pancakes. Be patient. The sound should be soft and swishy, not gritty.
4. Add Eggs and Vanilla
Add the eggs one at a time, beating well after each addition. Then mix in the vanilla extract.
The mixture might look slightly curdled for a second that’s totally fine. Keep going until it’s smooth and glossy.
5. Combine Wet and Dry
Gradually add the dry ingredients to the wet mixture, mixing on low speed (or stirring with a wooden spoon) just until combined. Overmixing develops gluten, which makes tough cookies instead of tender, gooey ones.
The dough will be thick and slightly crumbly. That’s exactly what we want.
6. Chill the Dough (Don’t Skip This!)
Cover the bowl with plastic wrap and refrigerate for at least 30 minutes. I usually go for 45 minutes.
Here’s why this matters for stuffed cookies (lava style) : Cold dough holds its shape around the soft filling. Warm dough melts into a puddle before the filling even has a chance to get hot. I skipped chilling once during a late-night craving huge mistake. The cookies merged into one giant, sad blob.
7. Assemble the Stuffed Cookies
Preheat your oven to 375°F (190°C). Line two baking sheets with parchment paper.
Scoop 2 tablespoons of cookie dough (about the size of a golf ball) and flatten it into a disc in your palm. Place one frozen filling portion in the center. Gently wrap the dough completely around the filling, sealing all edges tightly.
Roll the stuffed ball between your palms until smooth. Place on the prepared baking sheet, spacing 2.5 inches apart. Repeat with remaining dough and fillings.
Don’t rush this step like I once did when the filling isn’t fully sealed, it leaks out during baking. You’ll still have delicious cookies, but the lava effect happens on the pan instead of in your mouth.
8. Add Toppings (Optional But Beautiful)
Press 3–4 extra chocolate chips into the top of each dough ball. Sprinkle with a tiny pinch of flaky sea salt. The salt makes the chocolate filling taste even richer.
9. Bake to Perfection
Bake for 12–14 minutes. At 10 minutes, the cookies will look underdone in the center—that’s correct. Pull them when the edges are golden brown and set, but the middles still look slightly soft and puffy.
Let them rest on the hot baking sheet for 5 full minutes. This is critical. The carryover heat finishes setting the structure while keeping the lava center molten. If you move them too soon, they’ll fall apart.
10. Cool Slightly, Then Devour
Transfer to a wire rack or serve warm directly from the sheet. I always wait about 3 minutes before my first bite hot lava filling can burn your tongue (speaking from experience here).
Pro Tips for Perfect Results
Use an instant-read thermometer for your oven. My old oven runs 25°F hot. For two years, I wondered why my cookies burned on the bottom. Check your oven’s actual temperature.
Freeze the filling longer than you think you need. I aim for 30–45 minutes minimum. The colder the filling, the more dramatic the lava effect when baking.
One mistake I learned the hard way: Over-baking is the #1 killer of stuffed cookies (lava style). The filling needs the dough to be slightly underdone to stay liquid. If you bake until the centers look completely dry, you’ll have stuffed cookies with a solid chocolate chunk instead of a lava flow. Pull them early. Trust the 5-minute rest on the hot pan.
Weigh your flour if possible. Cup measurements vary wildly. Too much flour makes dense, cakey cookies that crack instead of staying tender. Too little flour makes flat, greasy disks.
Room temperature ingredients matter. Cold eggs or cold butter won’t cream properly. Leave everything on the counter for an hour before starting.
Variations & Add-Ons
Double Chocolate Lava Cookies
Add ¼ cup cocoa powder to the dry ingredients. Use dark chocolate filling. My teenager says these are “beyond restaurant quality.”
Salted Caramel Stuffed Cookies
Freeze soft caramel candies (like Werther’s or homemade) in tablespoon portions. Stuff into vanilla dough. Sprinkle with extra flaky salt before baking. This is my personal favorite variation the salty-sweet contrast is incredible.
Peanut Butter & Jelly Lava Style
Use peanut butter filling in half the cookies, and raspberry jam filling in the other half. Or combine both for a PB&J explosion. My kids lost their minds over these.
S’mores Stuffed Cookies
Add ½ cup crushed graham crackers to the dough. Stuff with chopped milk chocolate and a mini marshmallow. Bake as directed but watch closely marshmallows expand fast.
Vegan Stuffed Cookies
Use plant-based butter, flax eggs (1 tablespoon ground flax + 3 tablespoons water per egg), and dairy-free chocolate filling. Chill an extra 15 minutes before baking.
Breakfast-Style (Less Sweet)
Reduce sugar to ½ cup total. Use apple butter or pumpkin butter filling. Roll dough balls in cinnamon sugar before baking. Oat flour works beautifully here too.
Storage and Meal Prep Tips
Fridge storage: Baked stuffed cookies keep in an airtight container for up to 5 days. The lava effect softens slightly, but they stay remarkably gooey. Place a slice of sandwich bread in the container to absorb excess moisture and keep edges tender.
Freezing baked cookies: Cool completely, then freeze in a single layer on a baking sheet. Once solid, transfer to a freezer bag for up to 3 months. Thaw at room temperature for 20 minutes, then microwave for 10 seconds to re-melt the center.
Freezing raw stuffed dough (my favorite meal prep trick): After assembling the cookie dough balls around the filling, freeze them on a parchment-lined sheet until solid (about 2 hours). Transfer to a labeled freezer bag.
To bake from frozen: Add 2–3 minutes to the bake time. No need to thaw. I keep a bag of these in my freezer at all times for unexpected guests, late-night cravings, or “I forgot it was my turn to bring dessert” emergencies.
Best reheating method: Microwave individual cookies for 8–10 seconds. For a whole batch, reheat in a 300°F oven for 4–5 minutes. The filling becomes lava-style again every single time.
FAQ Section
Can I use regular chocolate chips for the filling instead of freezing them?
You can, but you won’t get that dramatic lava flow. Chips hold their shape more than chopped chocolate or Nutella. For true stuffed cookies (lava style), I strongly recommend chopped chocolate bars or a soft spread like Nutella that’s been frozen solid.
Why did my lava filling leak out during baking?
Two likely culprits: the filling wasn’t frozen enough before wrapping, or you didn’t seal the dough completely around it. I’ve made both mistakes. Next time, freeze the filling for 45 minutes and pinch the dough seams extra tightly. A tiny leak is fine major leaks mean flat cookies.
Can I make these gluten-free and still get the lava effect?
Yes! I do this regularly for my sister-in-law. Use Cup4Cup gluten-free flour and add ½ teaspoon xanthan gum if your blend doesn’t include it. Chill the dough for 45 minutes minimum. The cookies will be slightly more delicate, but the lava center works perfectly.
How do I know when stuffed cookies are done baking without cutting one open?
Look for golden-brown edges and slightly puffy, soft-looking centers. The tops might have a few cracks—that’s good. If the entire cookie looks firm and dry, you’ve over-baked. Remember, they continue cooking on the hot pan for 5 minutes after coming out of the oven.
Can I double this recipe for a party?
Absolutely. I’ve made quadruple batches for school bake sales. Just work in batches and keep your filling frozen while you assemble. The dough keeps in the fridge for up to 3 days, so you can prep ahead easily.
Conclusion (and a Friendly Challenge)
There’s nothing quite like watching someone bite into a warm stuffed cookies (lava style) for the first time. That moment of hesitation, then the slow smile as warm chocolate spills out—it’s pure magic. And now you know exactly how to create that magic in your own kitchen.
I’d love to hear how your batch turns out. Did you try the salted caramel variation? Did your kids (or partner) fight over the last one? Drop a comment below and tell me everything. And if you snap a photo of that perfect lava flow, tag me I genuinely love seeing your creations.
Now go preheat that oven. Your cookie destiny awaits. 🍪
Happy baking, friends!
for authentic recipes : tastivohub
Leave a Reply